Troubleshooting turnarounds
If the horse keeps trying to go forward once you’ve asked him to start the turnaround, just keep him in the proper bend and keep pushing his pivot foot up underneath him with your legs. He’ll eventually figure out that stepping into the turnaround is the easiest response to the cues that you’re giving him.
If he tries to turn just his head and neck, but not reach across with his outside front leg, I’ll go to back to exercises number three and four for a few minutes to tune up his response to my outside cues. Then try again.
Improving Turnarounds

In this session, we’re going to go back to turnarounds. As always, the most important part is the neck: Start at the front and work your way back. With the body controls that you have developed in your exercises, you have the ability to fix almost any problem. Moreover, remember, if you’re having trouble in the turnaround, don’t fix the maneuver; stop the maneuver and fix the problem.
Now up until this point you’ve been doing some real relaxed turnarounds while your horse learned what you wanted and where to put his feet. Now we’re going to try a few different things, and each will have a little different effect on your turns. First, every once in a while I want you to do a really collected turn, where you’re using both your legs to kick the horse’s back legs right up under his front and really making him bend in the middle and drop his head low. Once you have him collected you can release with your inside leg, or both for that matter, depending on the response you’re getting from him. While you’re doing this, you want to feel like you can put his head almost anywhere you want it and have him at any level of collection, while still maintaining the same cadence. Both of you will build confidence from this.
Improving Turnarounds

Objective
• To increase the level of difficulty on your turnarounds by adding a little more speed and collection
• To learn several ways to correct turnaround problems that many horses and riders get into
Things to Concentrate on
• Fundamentals! Soft neck, correct bend and cadence (or rhythm)
• Learning to feel when a horse is starting to draw back too far. If you’re driving the back end up this shouldn’t happen
• Increasing the difficulty without frightening your horse or getting him in an unpleasant bind
• Don’t get in the habit of using your outside leg for impulsion, it will cause problems in the long run. Tune your horse up to respond to your clucking if you need to, but outside leg will eventually start to make your horse invert his turn
Wrapping up hip control
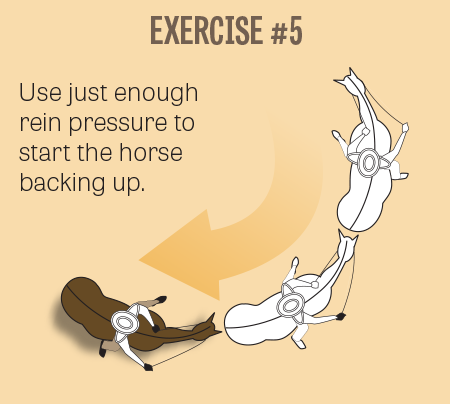
This exercise (“Exercise 5”) allows Les to find out if his zones will work together. Sometimes they do and sometimes they don’t; if they don’t you have to fix it.
Lots of signals in different directions
Aim for no resistance and good energy flow
What else is exercise # 5 good for? Develops muscles, tendons and ligaments for stopping on one side at a time
Making a horse relax
When you have control of all four zones, especially the head and neck, you can use this maneuver to take any tension out of the horse.
How much should you use this? 20–30 times a day is not unreasonable. If you’re getting stuck, identify the problem part and then work on it by itself. Then sneak from that exercise back into #5; the Columbo approach.
Hip Control through Backing

By now your horse should be backing fluidly, and it’s time to maneuver him around a little while he’s doing it, and that’s what exercise number five is all about. In exercise number five you will back your horse in a circle, with his spine matching the circumference of the circle. You need to be able to control every part of the horse’s body to make this work, so it’s a great test to see if all the parts are functioning correctly. I probably do it with every horse I ride every day.
If you’re having problems at this when you first start, it probably means you need to spend more time on exercise number four first. Remember: To try to go through these exercises too fast will only catch up to you later when you don’t get the response you want from your horse and you have to return to the basics. Get each exercise down cold before you move on. And any time you encounter a problem with a new exercise, go back to the last one to tune up your skills, and then try again.
Circles & Lope Departures I
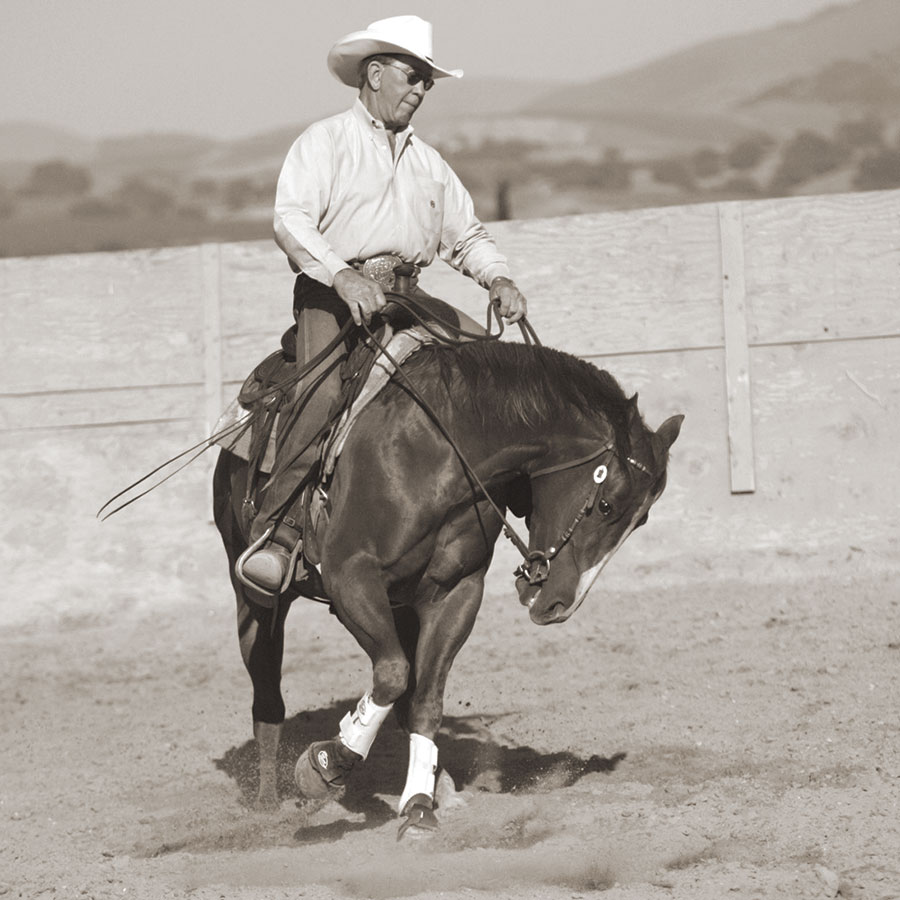
Here are some take-aways from Les’s recent columns introducing circles, departures and speed control.
Lope Departures
Collection: Before you can have walk to lope departures, you must be able to collect your horse without resistance. If you find resistance or a stiff spot, fix it before continuing.
Best frame: Straight through the head, neck, shoulders, ribs, and hips.
Acceptable: Head to the inside, shoulder to the outside.
Speed Control
Foundation Training for the Performance Horse with Les Vogt

What is speed control? It’s when we are moving at any gait and have the capacity to reduce or increase speed at will, with little or no effort on the part of the rider. There are a lot of ways to cue a horse to change speeds, but what we will work with here is the concept of riding with the motion. There are three actual ways to ride a horse’s motion: most people ride with the motion; a racehorse jockey leans forward and rides a half stride ahead of the horse to encourage speed; and lot of our real good riders ride a half stride behind the motion—where their weight and position are actually creating some resistance for the horse’s movement. It would be like if you tied a sack of rocks on one horse and had no rocks on another horse; the horse with the rocks tied on him is going to stop way before the horse without the rocks. Why? Because the rocks go against his motion so he slows down after a period of time.
Lope Departure
 Setting the horse up correctly for crisp, clean lope departures is a critical component for any reining pattern and a necessary prerequisite for lead changes. You should be able to get your horse in position, that is, be able to push his hip toward his eye, so that you will be able to ask him to lope off on the correct lead, although you might be getting a few trotting steps in the meantime.
At some point, you’re going to want to put him in position with your hands, cue him with your leg and NOT let him go anywhere until you feel him reach up and commit to the lope with his hind leg. Once he does, turn him loose and let him go. It’s something you work up to slowly, but there will be a point where it’s time to raise the bar and insist that he lope off from a walk, and eventually from a standstill. All it takes is patience and practice.
Smaller circles
 By now your horse should be moving along smoothly at all three gaits in your training arena. So the next thing we’re going to start doing is to ask him to become more responsive and balanced as you guide him around, and to try a few different maneuvers. We’re not really concerned with speed right now, but we do want gaits to be smooth and steady. If your horse is a little “chargey” elsewhere in this manual you’ll find ways to solve that problem.
Also, while we talk about lots of variations of the circle, you’ll want to spend a lot of time working in big circles—the size you would do in a reining pattern. In a reining class you’ll spend more time on your circles than anything else. You want your horse to guide so easily that once you put him on a circle he almost stays there on his own. We’re going to be adding speed to that circle in the future, so you want to spend time now making sure he is really comfortable in them.
Smaller circles
Last issue, Les taught us the importance of good “shoulders up” posture for proper alignment in a circle. Now we’ll look deeper into circle exercises.
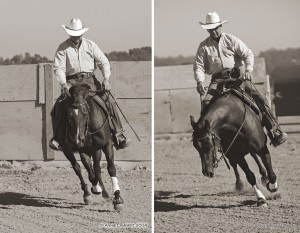
Here is a horse (left) that is dropping his shoulders to the inside. You can correct this by pushing the ribs way out (right).
As you ask your horse to handle smaller circles, you’ll want to remember the motorboat image we discussed before. Keeping your weight back will encourage your horse to do the same, therefore lightening up his front end for easy maneuvering.
To start this exercise, pick up a trot with the rail of your arena on your right-hand side. In diagonal corners you will want to maneuver the horse into approximately 30-foot diameter circles. To begin, using a very light direct and neck rein, start your circle to the left. If you immediately get a response—great! If not, tell him he should have responded by collecting him with your hands and then bringing his nose a little more firmly to the inside while keeping your outside rein out and away from his neck.
This will set your horse back a little, shifting more of his weight to his hindquarters, at the same time making him move a little more dramatically to the inside with his front end. Within the next couple of strides, repeat the same cue and correction sequence.
At first you’ll be riding what will look more like a square or even an octagon than a circle, but as the horse starts to understand the sequence, he will start to balance himself to respond to the light cues, rather than waiting for you to correct him. Once the horse is responding well at the trot, move on to the lope.


 Read Columns
